Grizzco Blaster(クマサン印のブラスター)

A cool-looking Grizzco Blaster can be divided into three parts:
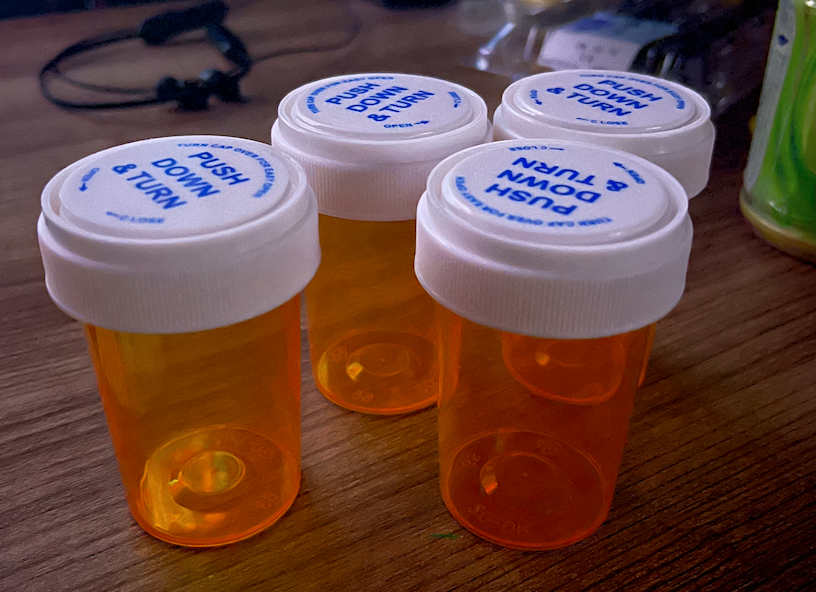
- glowing pill case : the four yellow/orange tube cases on the top of the weapon
-
water spray mechanism : ultimately, it’s a water gun

- shell : of course, it should look like the Grizzco Blaster
In the following three sections, I will describe these parts in detail.
1. Glowing Pill Case
Although the cases do not glow in the game, I think a glowing case looks cool.
Components used are :
- Pill Case $\times$ 4
- Power LED $\times$ 4 : KD-JP3W-WW-HS
- MOSFET $\times$ 4 : 2SK4017
- MCU : XIAO ESP32C3
1.1 LED Controlling
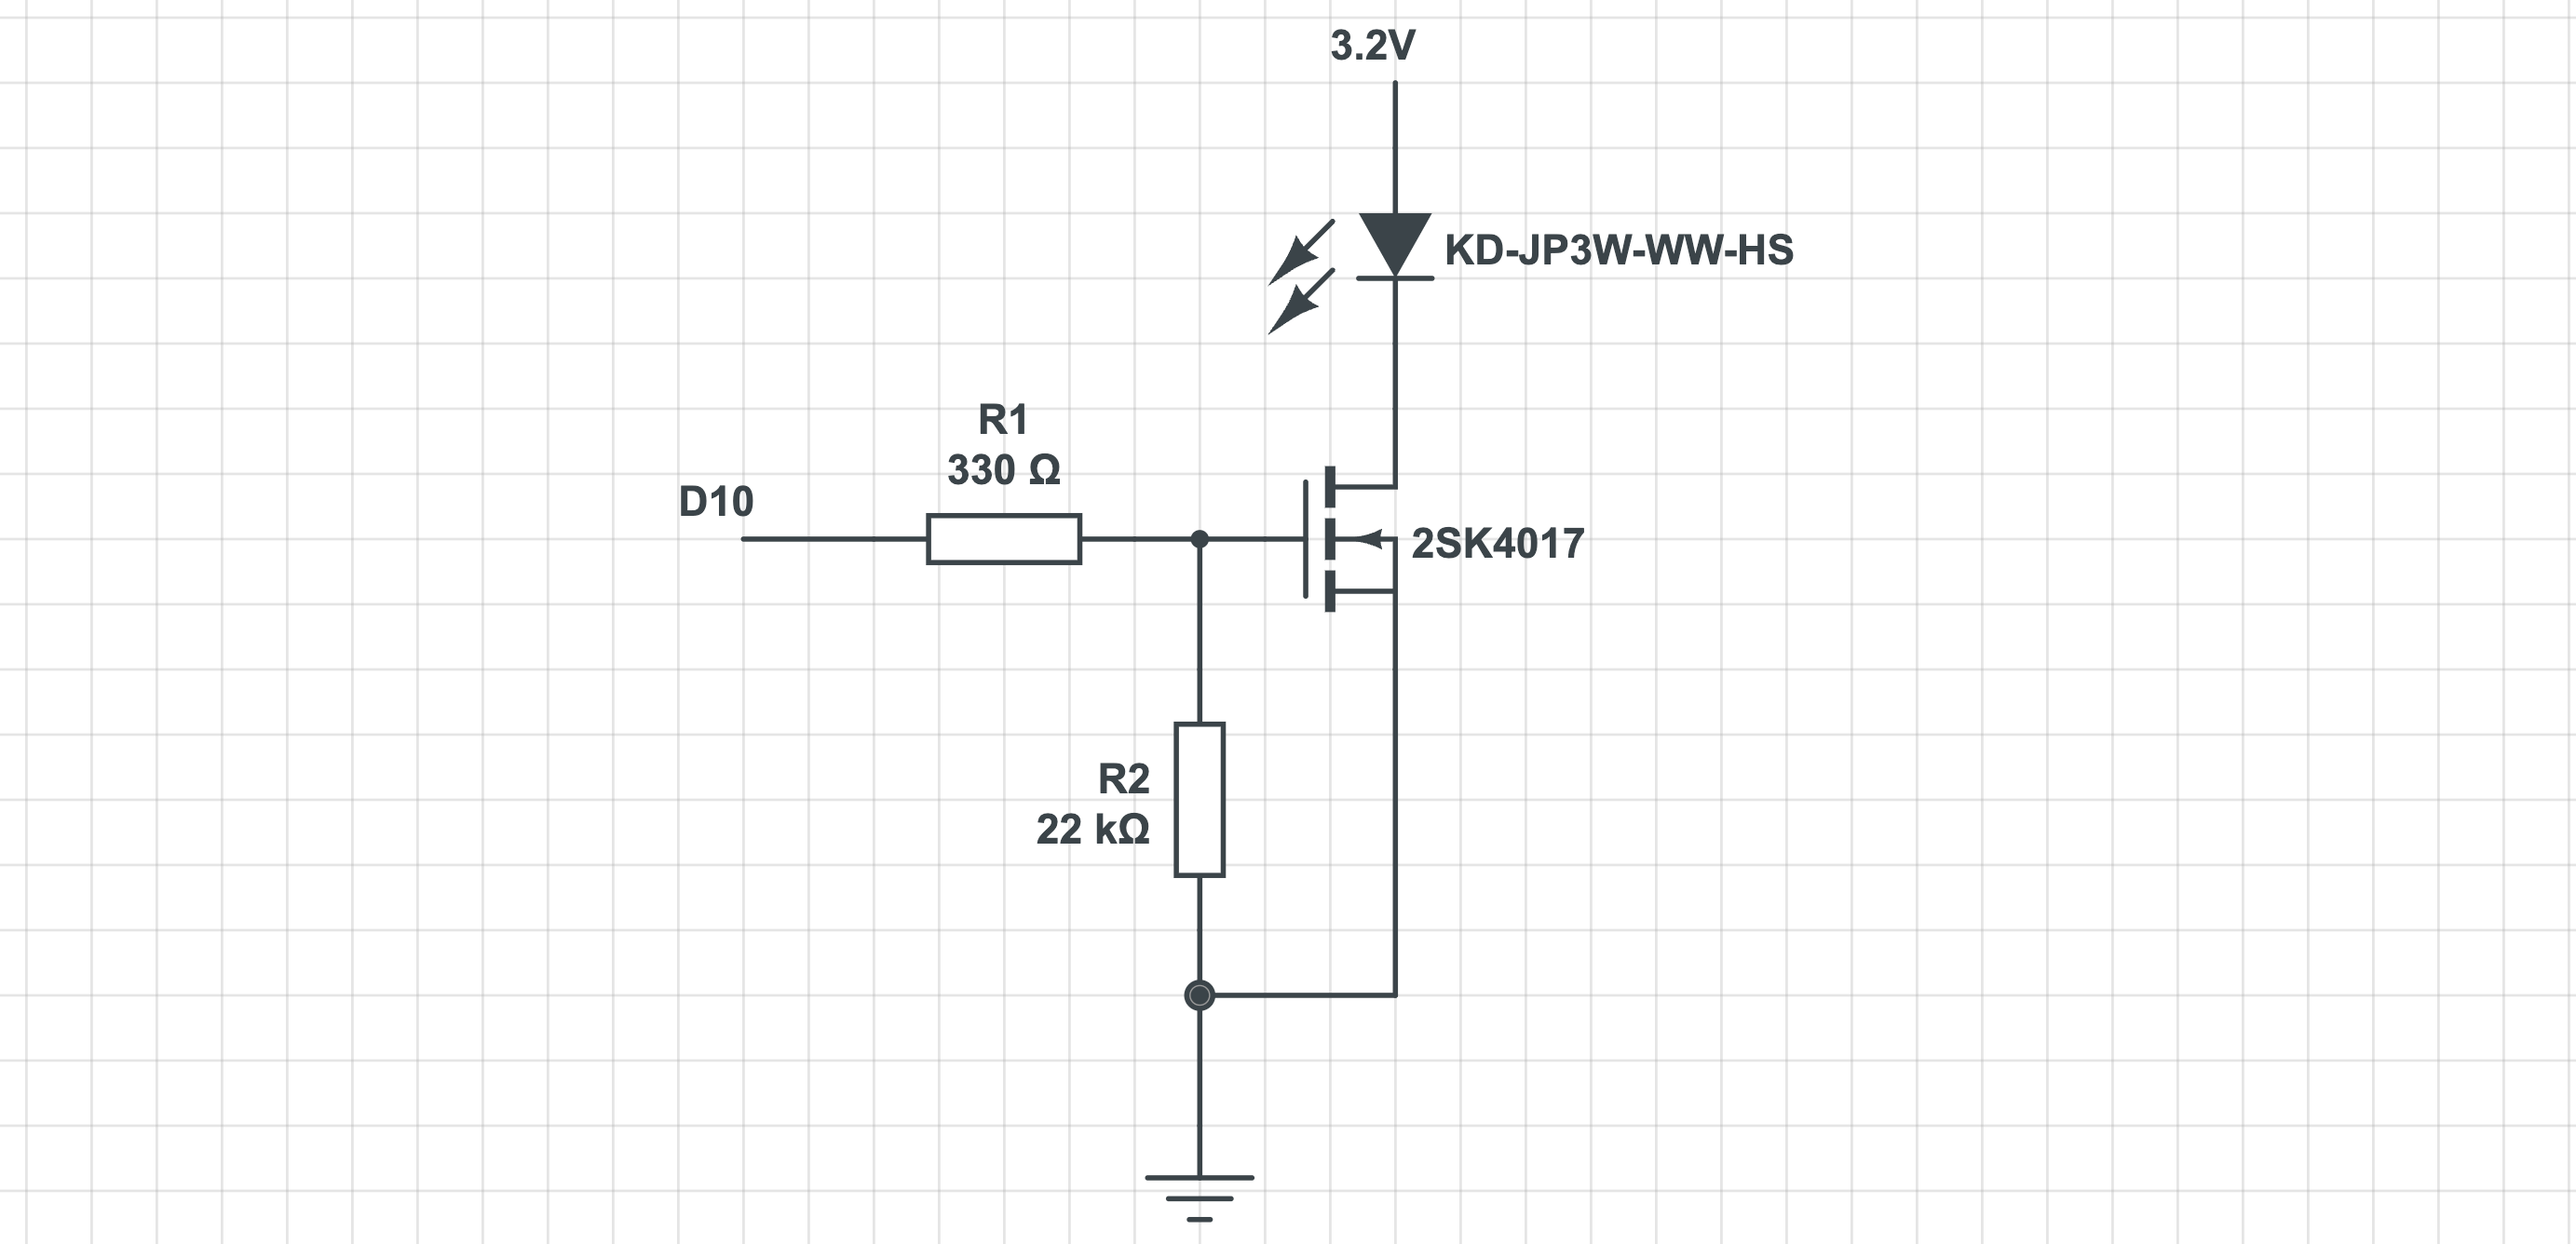
The rated current of the power LED is up to 700mA, but the max current per GPIO is about 40mA for ESP32. So the basic idea of lighting a power LED is using the MOSFET. MCU controls the open/close of MOSFET. When MOSFET is opened, power is connected to the power LED. By controlling the open/close proportion of MOSFET in a short period, we can change the brightness of LED. This can be simply done by the PWM. The following circuit shows controlling a power LED by MOSFET using D10 pin :
The classic analogWrite only support 8-bits sampling on esp32c3. It’s a bit too coarse. After some searching, I found the ledc functions. According to espressif’s docs,
- resolution select resolution for LEDC channel.
- range is 1-14 bits (1-20 bits for ESP32).
I seems I can control the brightness very precisely using up to 20-bits.
But after my test, I found that ledcAttach accepts at most 12-bits for esp32c3. But anyway, 4096 is far more detailed than 256 ![]() .
.
On the other hand, although we can control the brightness of LED linearly, human eye’s perception of brightness is not linear. So we should also do the gamma correction.
1.2 Working Modes
The trigger has two stages :
- charging : when half pressed, the blaster will be charged(LEDs light up gradually);
- shotting : when fully pressed, the shotting starts(LEDs blink);
- discharging : when released, the blaster will be discharged(LEDs fade out gradually).
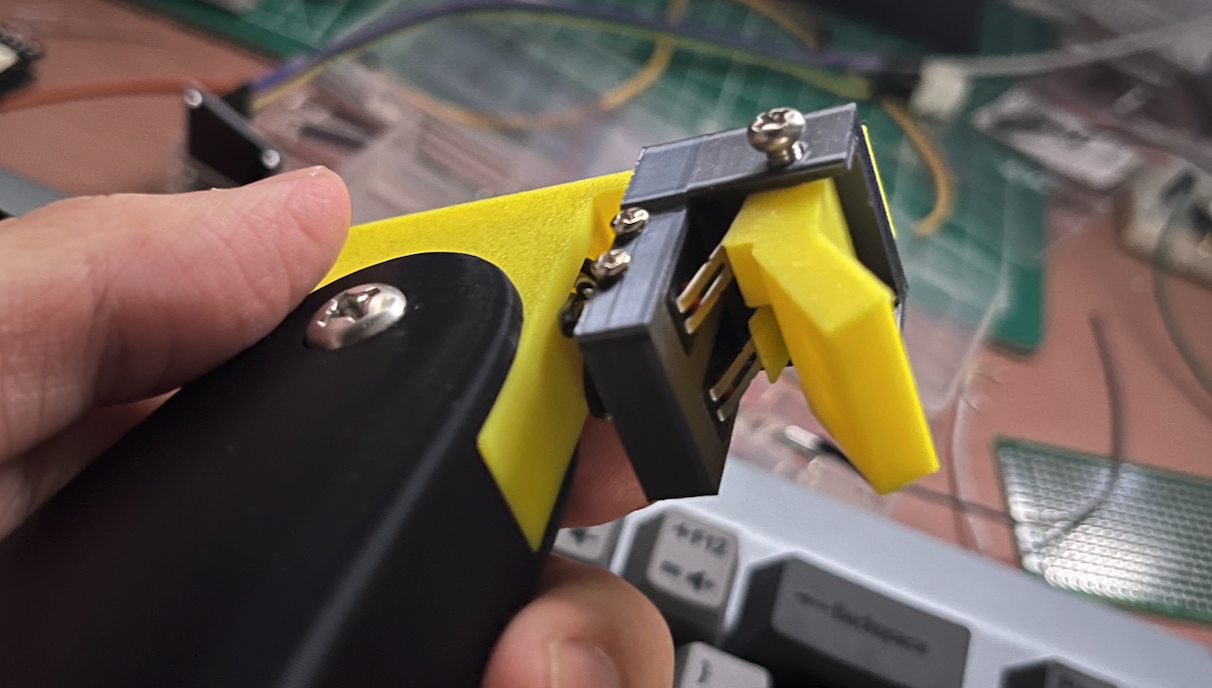
To enable two-stage pressing, I made a trigger consists of two buttons. The trigger has two protrusions with different heights. So one button will be pressed earlier than the other, which enables a two-stage trigger.
(BTW, the handler was from sploosh-o-matic)
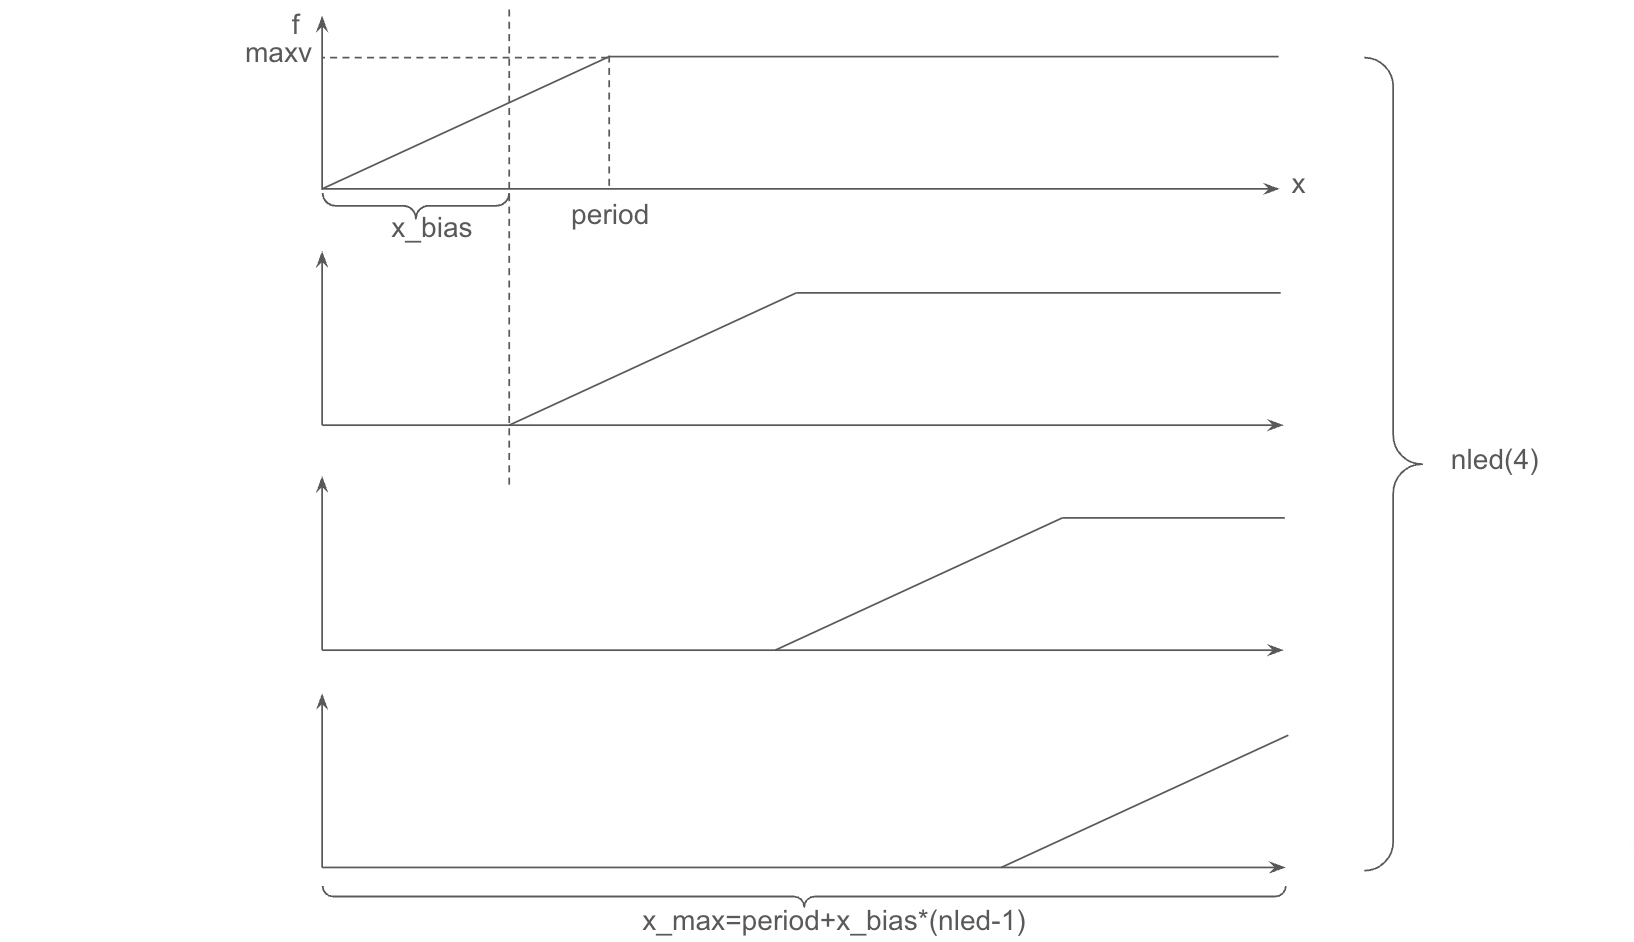
To make the charging and blinking look smooth, specialized brightness curves are needed to be designed. For example, the brightness curves for an LED in charging process can be a slope function with bias :
Also, considering that we also need to control other peripherals, the whole control logic will become quite complex. Therefore a RTOS is necessary. For the ESP32, the FreeRTOS is currently the best choice.
1.3 Sound Effect
Of course I can extract the sound effect from game directly and play it using a MP3 player like DFPlayer. But to achieve as high realism as possible, I think it’s better to use a more physical method, e.g.
- motor
- coils
TODO
1.4 Internal Liquid
I’m not sure if there is any liquid inside the cases. But since there is a case, something should be put inside it. According to the picture of the game, it seems there is a golden egg inside each case. So I think a proper solution is some liquid + a golden egg, similiar to this image. Good thing is, they are selling the golden egg on the Nintendo Store; Bad thing is, it’s too small.
Beside giving a sense of high energy, liquid insde the case should also soften the light. Here are some candidates:
- water
- baby oil
- glycerin
TODO : test candidates
1.5 Prototype
Here is a prototype of the glowing pill cases working in
- charging -> shotting -> discharging
modes :
2. Water Spray Mechanism
The water spray part consists of
- spray nozzle
- solenoid valve : ATS04220D valve
- hose and connectors
-
boost converter module :
MT3608NJW4131 - buck converter module : LXDC55
- MOSFET : 2SK4017
- MCU : XIAO ESP32C6
- water supply : my shower
- (optional)pressure regulator
TODO : topology diagram
2.1 How does it work ?
2.1.1 Hardware
The MCU generates a high voltage to open the MOSFET. Then the MOSFET enables the connection from power supply to solenoid valve. When the solenoid valve is turned on, it will open the valve using the electromagnet. The water is then sprayed out through the nozzle.
Therefore, we can control the water spray by generating a high or low voltage.
The solenoid valve, however, may be difficult to open when the water pressure in hose is too high. In this case, we can connect a pressure regulator before the water supply. Then adjust the output pressure until the valve can open and close smoothly.
2.1.2 Software
In the valve_task, when the trigger switch is pushed down :
- Single-shot Mode : for a single-shot weapon, e.g. Range Blaster, signal will be set to high for a short time(about $75\text{ms}$), then to low;
- Full-auto Mode : for an full-auto weapon, e.g. Grizzco Blaster, signal will be set to high and low repeatedly, until the trigger is released. The repeating frequency should be lower than the valve response time to make sure it has enough time to turn on/off. Fortunately, although the Grizzco Blaster fires fast($\text{period} \approx 150\text{ms}$), it is much slower than the valve.
- Normally Open/Closed Mode : for debugging
2.2 Prototype
The following video is a watergun prototype having multiple working modes :
- normally open/closed mode
single-shot mode- full-auto mode
(please mind the volume).
The power of valve was generated by converting a 7.2V Li-ion battery into 12V. The MT3608 I bought can only output 270mA current according to my test, and the workable pressure threshold was 0.2MPa. However, the rated current of valve is 400mA. So I changed to NJW4131 which can output 1~1.4A current. Now I can higher the threshold to 0.3MPa. This dramatically improved the power of waterflow.
BTW, the recoil was really strong, maybe I don’t need an additional recoil generator.
Also, a better installation for valve is keeping the electromagnet at the button(the one in the video is a bad example), which makes it turn on/off more smoothly.
3. Shell
TODO